


INFORMATION ABOUT HEATER CONTROL DEVICE AND CONSIDERATIONS
Information about Heater Control Device
Heater control system used in welding machines is ENDATC1731 TP model. Pt 100 type thermocouple has been used in machines. Its verification is ±% 0,5. The temperature control device works at 220 ± 35 Volt.
Adjusting heater temperature:
- Press Set button for 5 seconds.
- Heater working temperature appears on the screen.
- Adjust any temperature value by using arrows up and down.
Considerations
Measure generator exit voltage before inserting plugs of welding machine into energy plugs coming from generator after operating your generator. Otherwise, high (220+35=255 V etc.) voltage may come from the generator. In this case heater control device shall lock itself in terms of security and the system shall not work. Fluctuation of generator should not pass %±15 V.
Do not change any rate in your heater control device as much as possible excluding set value which appears on the screen when set button is pressed for 5 seconds.
Begin controlling firstly energy, voltage then turn on the fuse on our panel.
Plugs in the entry of our panel in our machines are for heater and trimmer and because one can not be inserted to another, wrong plug problem shall not appear.
INFORMATION ABOUT HYDROLIC SYSTEM, ADJUSTING WELDING AND TRIMMING PRESSURE, CONSIDERATIONS, TECHNICAL INFORMATION ABOUT BUTT WELDING
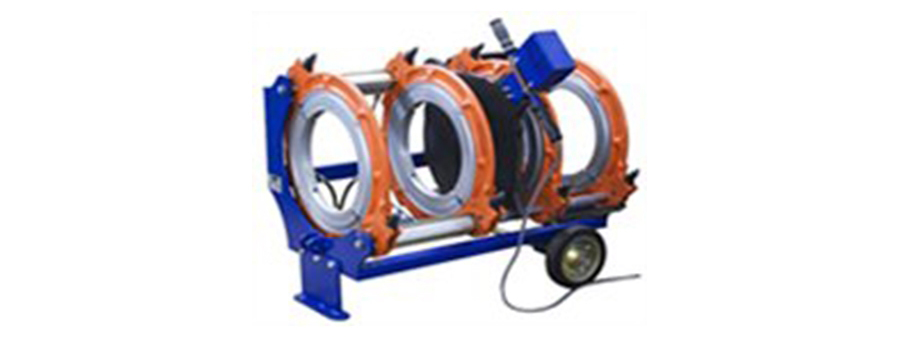
Information about Hydrolic System
Pressure settings are provided via a hydrolic unit in Ø 90/315 and Ø 315/ 500 welding machines. Hydrolic connections are Quickconnect type.
Attaching Welding and Trimming Pressure:
There is a manometer on the panel and screw near it to set the pressure during welding. Pressure shall be set by turning this screw during welding and trimming.
Provision of Machine Movement:
Forward and backward movement of the machine is hand portable type or located on the machine according to type of the machine. Walking of the machine is provided by pressing these buttons. There are two types of button function.
In the first type, as you press the button only moving occurs.
In the second type, when you press the button and leave it, movement continues. Bringing the parts to be welded near is provided with “forward walking” button, taking away from each other is ensured with “backward moving” button.
Considerations
When hydrolic connections are dismounted from panel of the machine or machine, their cover must be closed definitely not to fill with dust and soil. Otherwise valve can be choked.
During bringing trimming parts near, if value of pressing pressure is too much and trimmer is forced, pressure should be brought down by turning the screw.
Technical Information about Butt Welding
Butt welding is a connection method performed by sticking pipes and fittings in the same diameter and wall thickness butt by butt. Mouth parts of the parts to be welded are trimmed properly and heated to melt temperature. Welding pressure, temperature and time are adjusted in a way that the material does not spoil its own chemical and physical features. The connection in a qualified butt welding has the same resistance with the original pipe miminum. Welding pressure, temperature and time parametres should be adjusted elaborately.
Main steps of butt welding operation is indicated in the graph below.
Change in welding pressure in graph is indicated depending on time. Heater in welding temperature is placed between the pipes whose butts are trimmed properly and pressure is risen up to P value. Pipes are kept under this pressure for t1 period to ensure that complete contact can be provided between pipe butts and heater level. This period is the period to perform any lip height.
Then pressure is decreased and fixed in a value close to zero. This total period is indicated in graph t2. Because keeping this period shorter than required may cause depth of melted plastic part to remain shorter than required for welding, this should be avoided.
In following stage, heater is removed and pipes are sticked butt to butt. This change time is indicated with t3. Pressure effecting becomes zero within this period. It is very important to keep this period as much as possible, because pipe mouths shall be about cooling and melted material may probably perform thermal oxidation. In such a situation, quality control falls very much therefore removal of heater and adhesion of pipes should be realized very quickly.
After bringing pipes butt to butt, pressure is increased gradually in t4 period and reached to welding pressure (P).
Sticked pipes are kept for t5 period under welding pressure and leave for cooling. Period of cooling in pressure has a very significant effect on welding quality. Consequently, a very frequent mistake, keeping cooling period short results in bad connections.
STEP BY STEP WELDING PROCESS, TIME AND VARIABLES OF WELDING PROCESS, TIME AND VARIABLES OF WELDING PROCESS, CONSIDERATIONS REGARDING WELDING QALITY
Step by Step Welding Process
Maximum pressure values required to be applied are calculated with formulas below depending pipe diameter and wall thickness of the pipet o be welded. Time-temperature processes to be applied for welding process are given below. These values should be obeyed for a welding according to standards.
1 - Pipes to be welded are placed into machine, heads are compressed in a way that they grasp the pipe strongly.
2 - Trimming machine is put onto shafts of machine. Engine of the trimmer does not work before getting signal “placed” from contact stating that trimmer was placed onto the machine. This is a precaution taken to prevent inserting wrong trimmer and prevent accidents.
3 - After the trimmer is inserted correctly, forward button of walking is pressed and pipes approach towards trimmer and pressed.
4 - After the trimmer completes its process, pipes get far away from the trimmer with backward walking button and trimmer is taken from the machine by pulling security pin.
5 - After the trimmer is taken, pipes are brought near with bacward walking button and controlled whether they contact each other completely butt to butt. Pipes are taken away from each other with bacward walking button to place heater between them
6 - Heater is inserted into the shaft of the machine and pipes are pressed to the heater according to the pressure obtained from the Formula given below. Under this pressure, waited for heating period (t1) in pressure and when this period ends, button of walking with pressure is not pressed.
P.Welding pressure
D: Pipe diameter (mm)
e:Wall thickness (mm)
A: Welding Variable
(generally can be accepted as 0,013-0,018)
7 - After leaving the button, waited for heating period (t2) without pressure below and walking backward button is pressed. This process is so significant. Expansion of heated pipes, removal of heater and taking pipes butt to butt again should be performed within t3 period.
8 - After heated pipes are sticked butt to butt, pressure should be risen to P pressure calculated slowly within period to increase pressure 4t. Therefore, after pipes are brought butt to butt, pressure screw is turned, pressure is decreased, forward walking button is pressed and pressure is followed from manometer by turning screw and risen to P pressure.
9 - Waited for t5 period under this P pressure and then forward walking is turnd down and left to cool.
L1: Lip height the pipe created at the end of heating period with pressure.
t2: Heating period without pressure (t2=10X wall thickness; Pressure<0,2 bar)
t3: Removing heater and bringing heated pipes butt to butt
t4: Period to increase pressure
t5: Period to cool in pressure
Considerations regarding Welding Quality
As well as the parametres stated above to obtain a succesful welding;
1 - It should be considered materials to be welded are in compliance to each other.
2 - Machine working area should be protected against these effects in environments with moisture, wind or low temperature.
3 - Butts of pipes to be welded should be protected against direct sun light etc. to ensure that they are the same at the end of heating period.
4 - Butts of pipes to be boiled before welding process should be cleaned not to cover dust, dirt etc.
5 - Pipes should be tied strongly to the heads before starting welding process. This is necessary both for parts to obtain a true welding by centralizing completely and for parts to rescue from the head during trimming and prevent giving damage to the operator.
6 - Welded parts during welding process (including cooling period) should not be exposed to any mechanical force and forcing. vii) Another part of welded pipe should be placed on sliding ground it can move easily. This is necessary in ters of provision of forward-backward feeding without applying any force.
7 - Make sure that trimming blade is in necessary sharpness. Blade should be sharpened in certain time intervals or changed.
8 - There should be no deep scratches, notches in teflon coating of the heater. Heater surface should be controlled periodically.